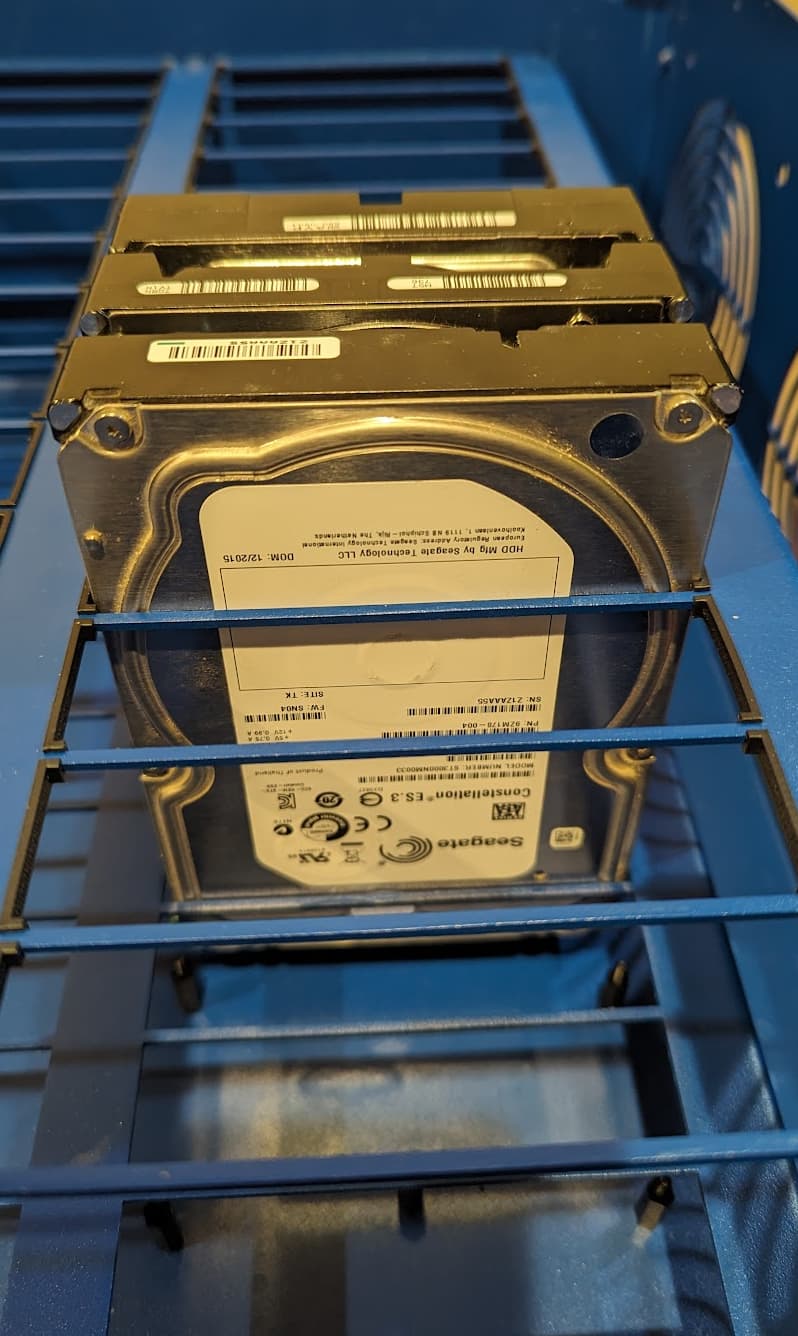
I have an older Backblaze Storage Pod 2.0 that is starting to get hard to find parts for. I was wondering if someone had the specs/dimensions of the HL15 backplane as I was wondering if I could retrofit it in. I looked into a sata 3 upgrade for my current setup but those sata expanders/backplanes don’t seem available anymore. Any info would be great, I imagine 45drives would eventually allow purchasing of just the backplane for the HL15 so I thought it might be a possibility.
With a lot of the community feedback it seems like 45Drives might add the backplane to the store. There have been a ton of requests for it in the feedback request post. You could go request it to be added as well to show further interest.
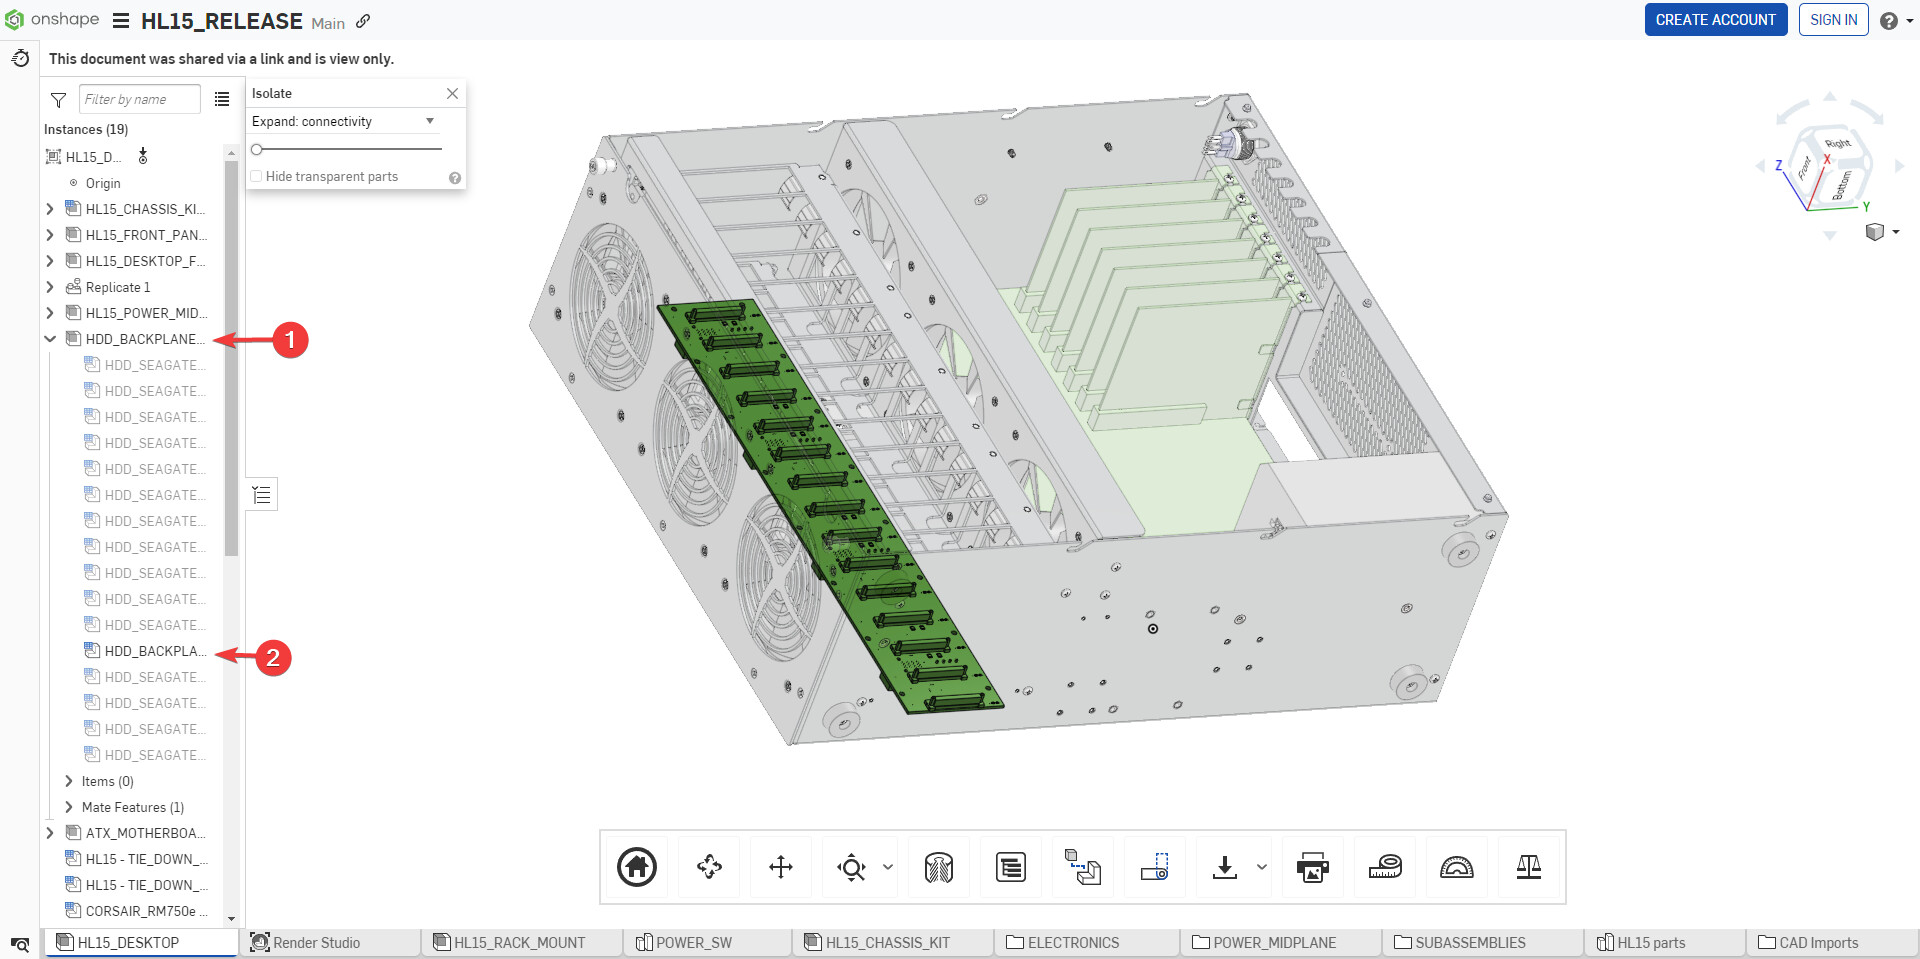
Also if you need any of the HL15 specs, the entire CAD model is downloadable here.
Thank you. I was just on the mailing list for the release but didn’t know they released full models of the chassis and internals. I’ll have to compare that to what I have.
@blitz So from what I remember the drive spacing is different so I would have had to have new drive slots/holders laser cut and that is assuming the backplane will be released as a standalone product. That was at least the case when I measured my storage pod 2.0 with the CFI-BXX53PM boards. I ended up going a different route by designing my own direct wire backplane. Really more of a a mounting system for 8643 fanout cables. The laser cut parts should come in soon so I should be able to test in the coming weeks.
@yingste I’d be interested to see how your approach turns out. I was trying to find the cables they used for the retrofit 2.0/3.0 to 4.0 direct drive and the closest I could come up with was these off aliexpress. They have screw holes but aren’t right angle and are sata only.
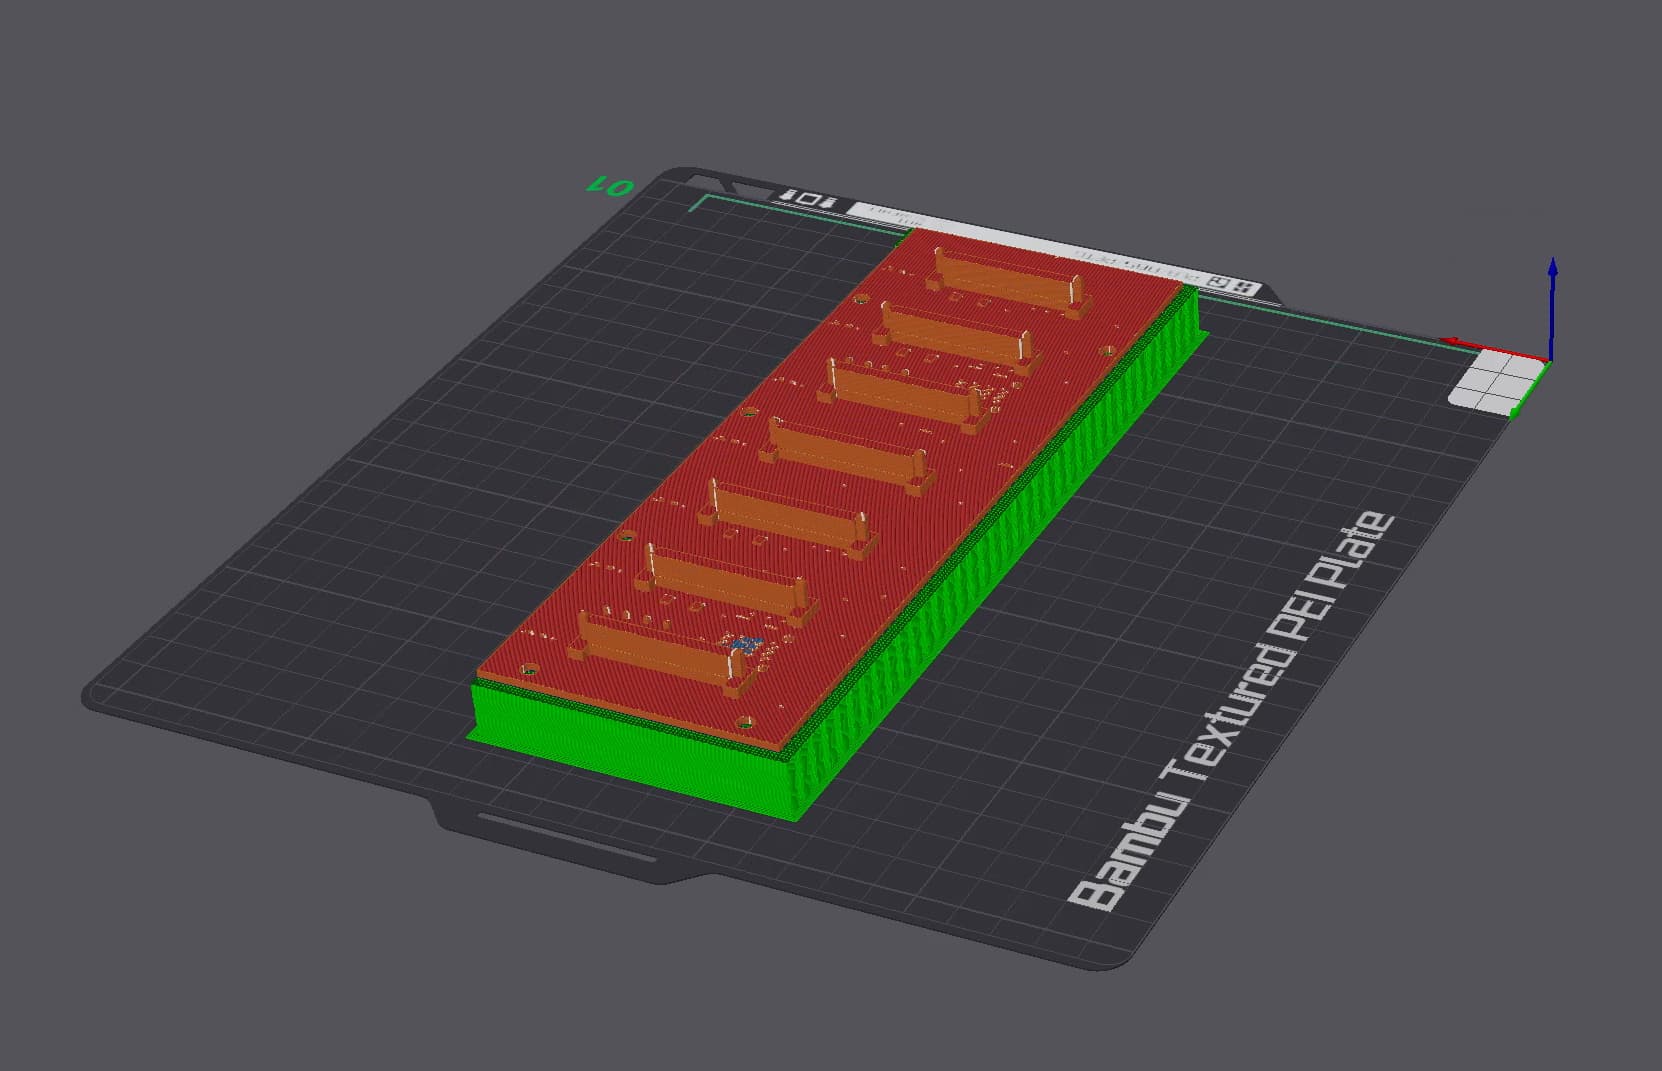
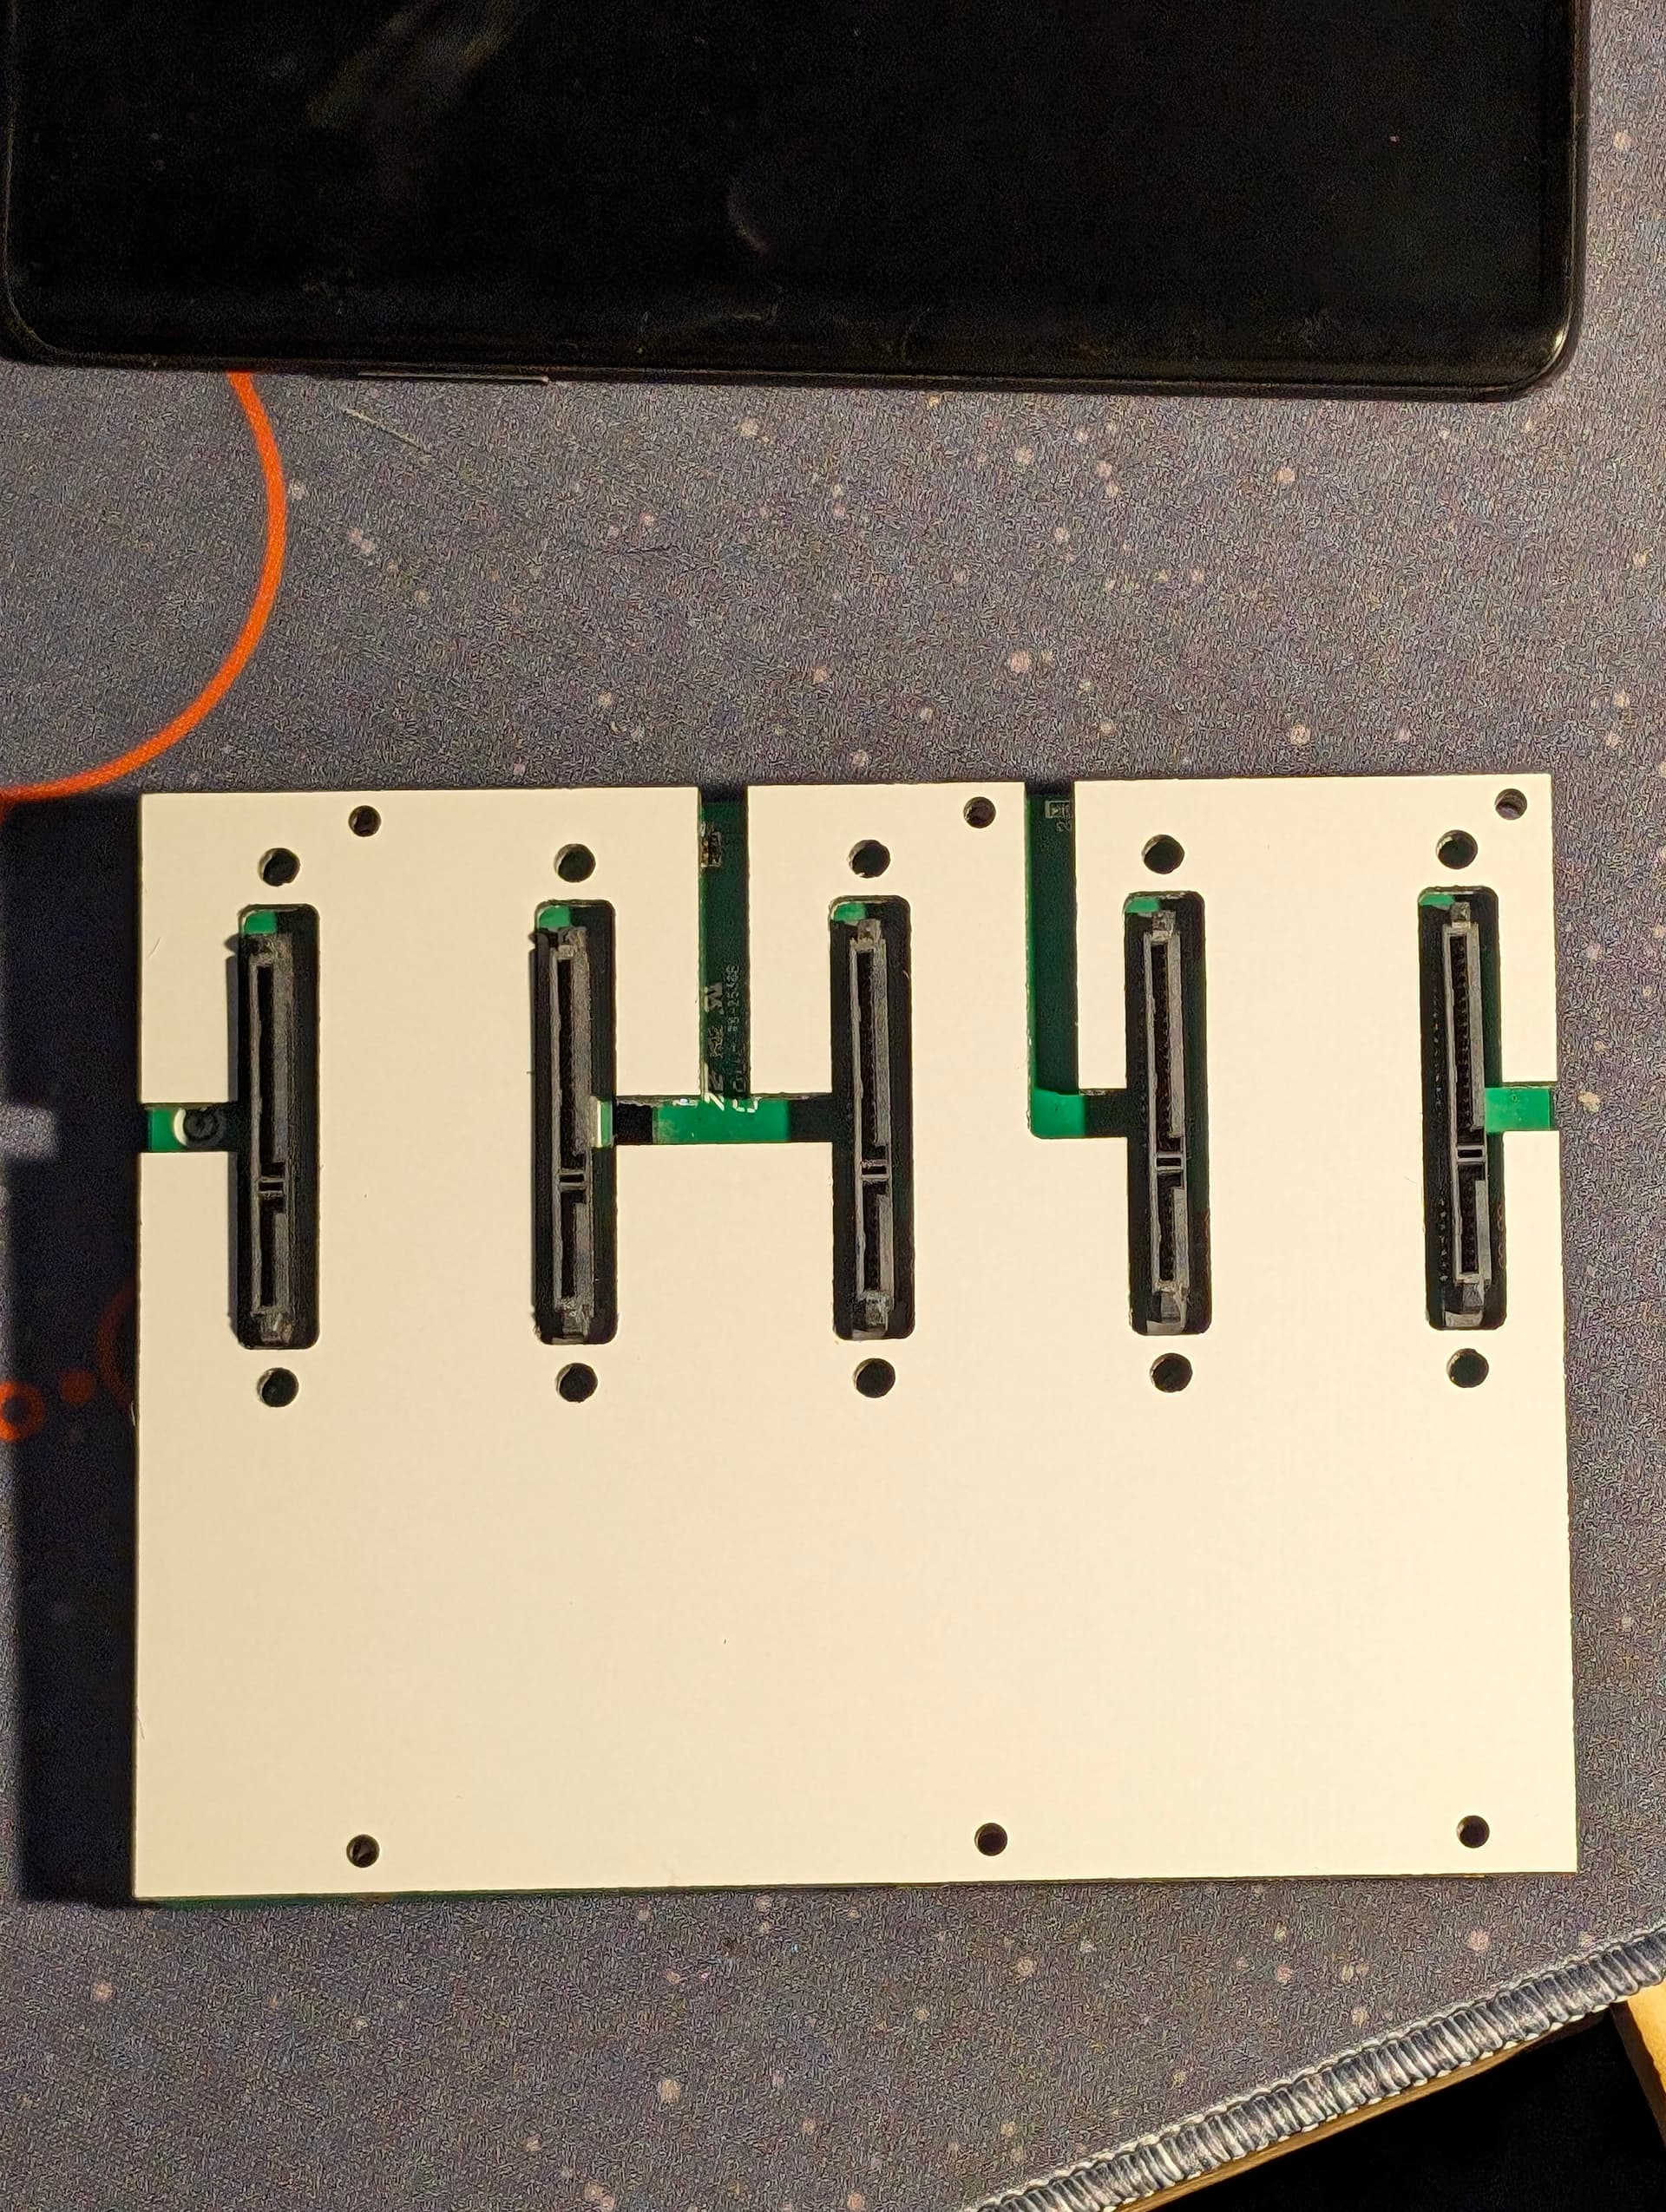
I haven’t measured the drive cage gaps on mine yet, I decided to 3d print the backplane first to see if things would line up and maybe make a adapter bracket for the original mount points. I guess I will find out on the spacing when my print is done.
So I went down a rabbit hole trying to find the original cables. The best thing I found so far was these from Highpoint: https://www.highpoint-tech.com/product-page/8643-4sas-1m
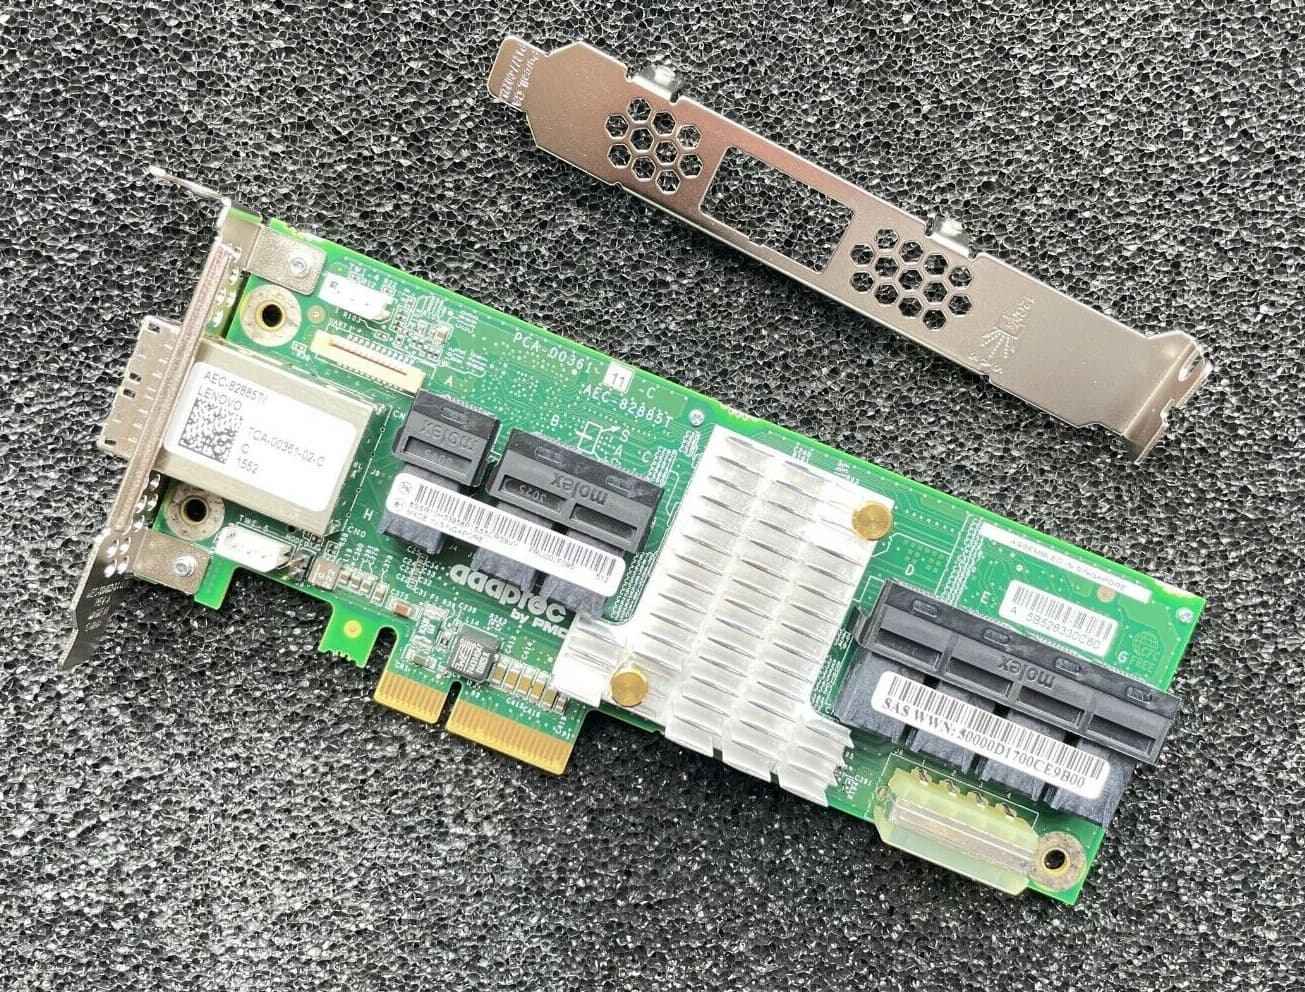
My main concern though is that I don’t know if they are still in active production. I ordered enough for myself but without checking with Highpoint I can’t be certain how long they will stick around. While I was waiting for the laser cut parts to come in I did test everything electrically and it does work great performance wise at least. Using a LSI 9300-16i with 3 Adaptec 82885t sas expanders. My brackets could probably be 3d printed but laser cutting isn’t that expensive these days and my printer isn’t very reliable
Edit:
Wow those are very close in appearance to what I found. The ones I found at one point on aliexpress had a completely different panel mounting system.
@yingste Yea my search ended there, only two molex power too so it would have been less spaghetti. Its weird though, they used male plug(female receptical) molex. And only sata.
Those highpoint ones look really good, full sas and has the screw holes. I’m tempted to go this route now. Would you be willing to share your bracket with me?
If you email info@45homelab.com they will let you purchase backplanes separately. However, the issue is fitting them in the older storage pods. Usually that isn’t possible without modification from what they told me.
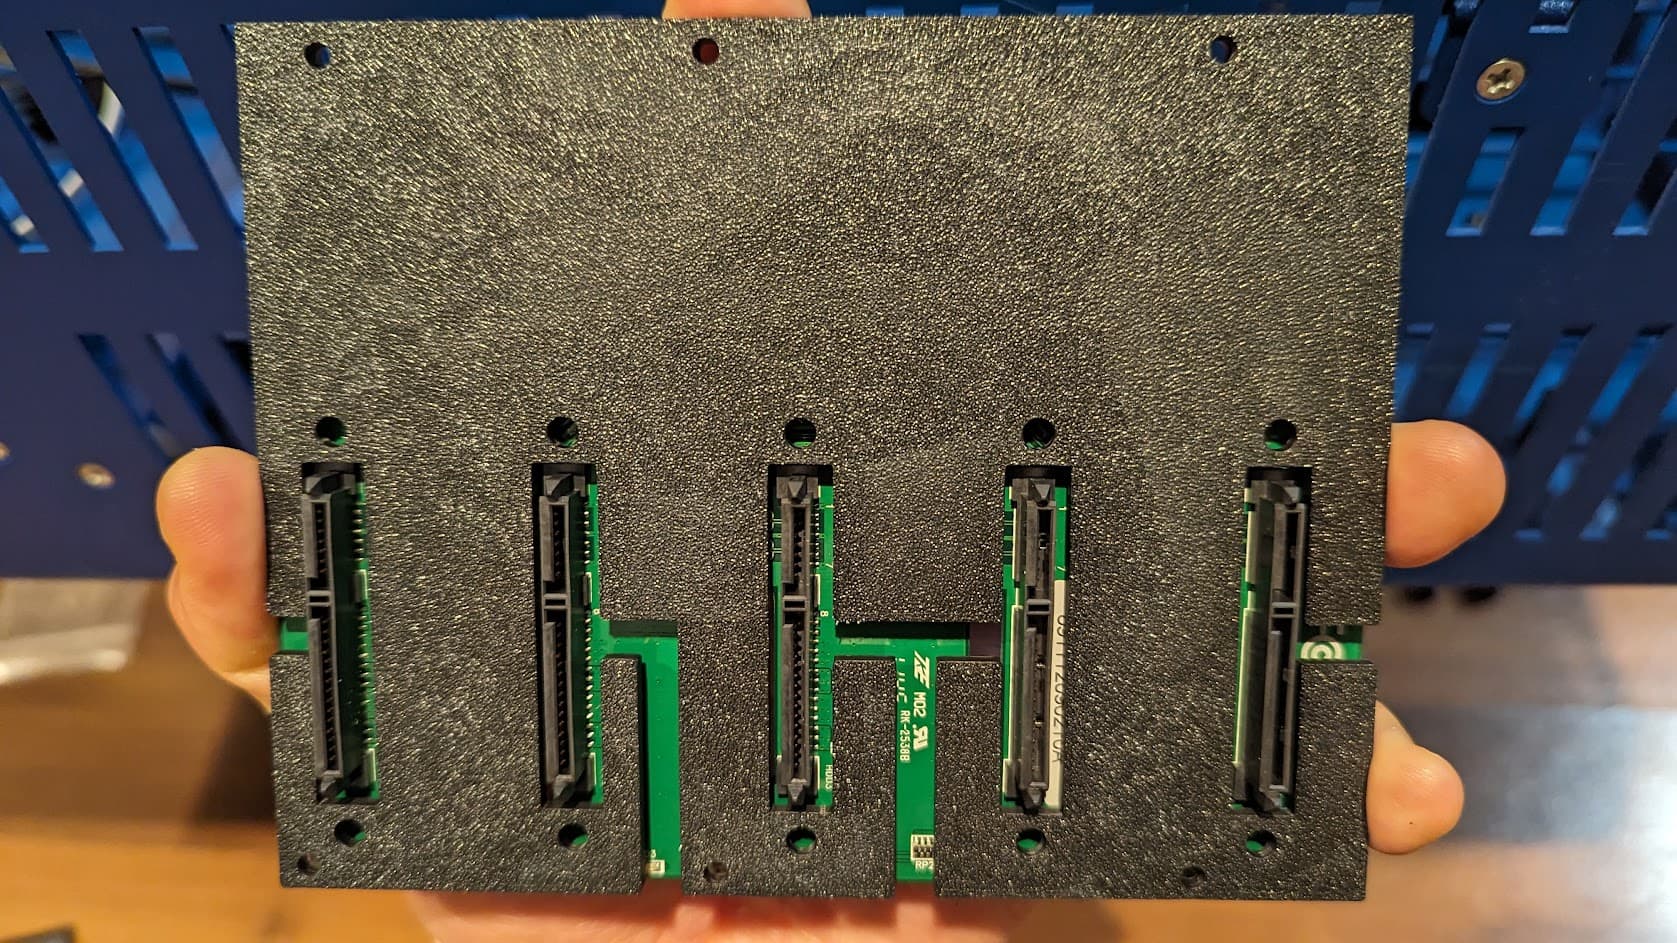
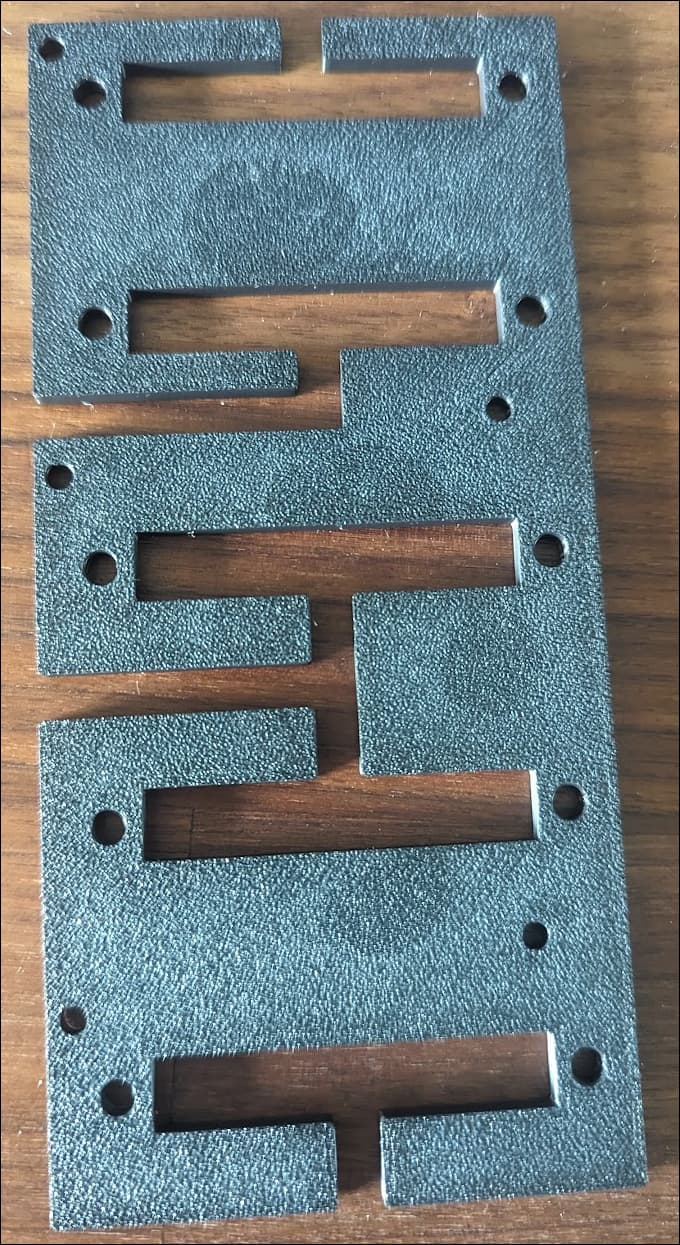
Well the parts came in. Looks like it will work. I’ll know how easily everything goes together in the next week or two. All the mounting holes line up. The slots for the SAS ports are a little off but I left some adjustment room in.
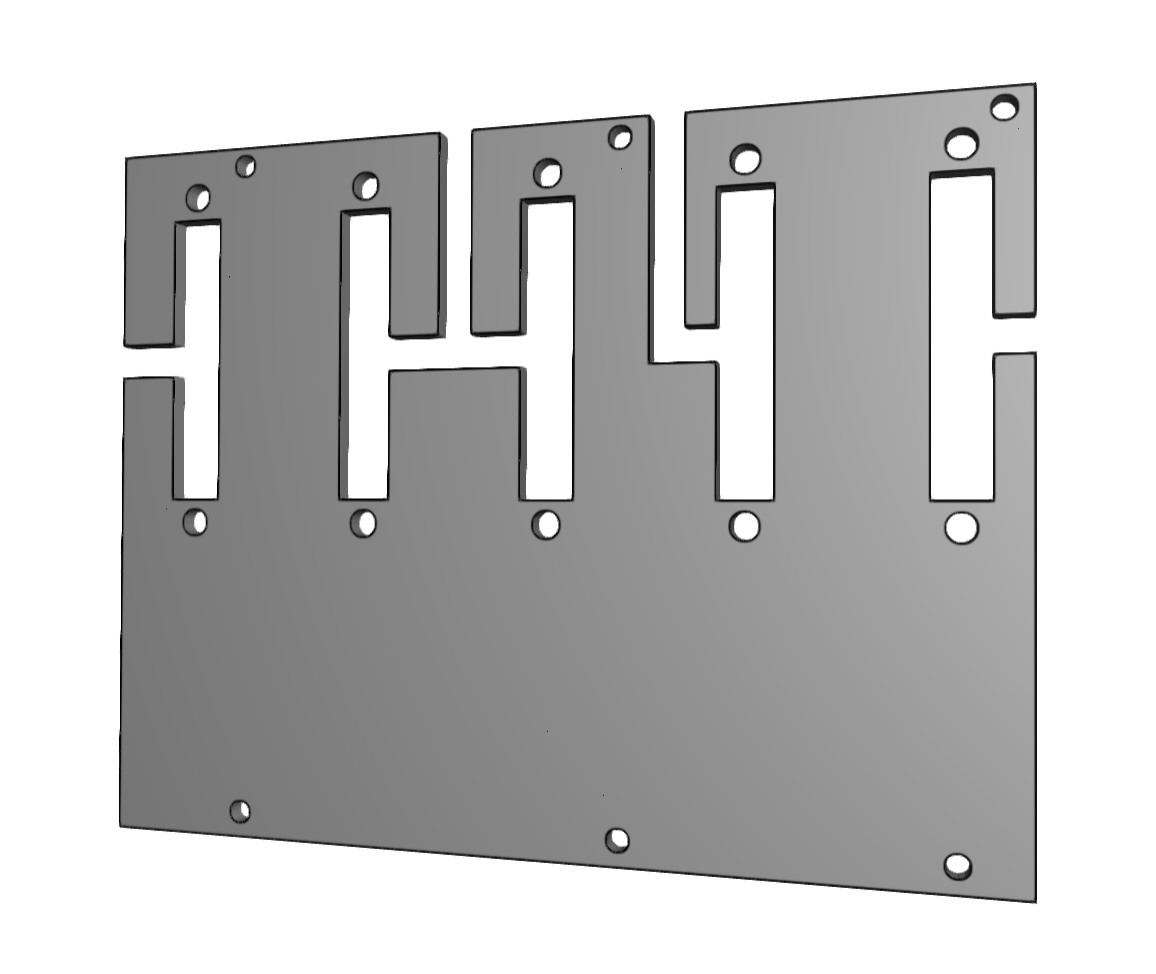
Thanks for sharing the drawing. Yea it looks pretty good against the pcb with some wiggle room. I placed my order on the sas cables last night.
I’ll probably convert your drawing into a model for 3d printing.
Looking forward to your write up and progress photos.
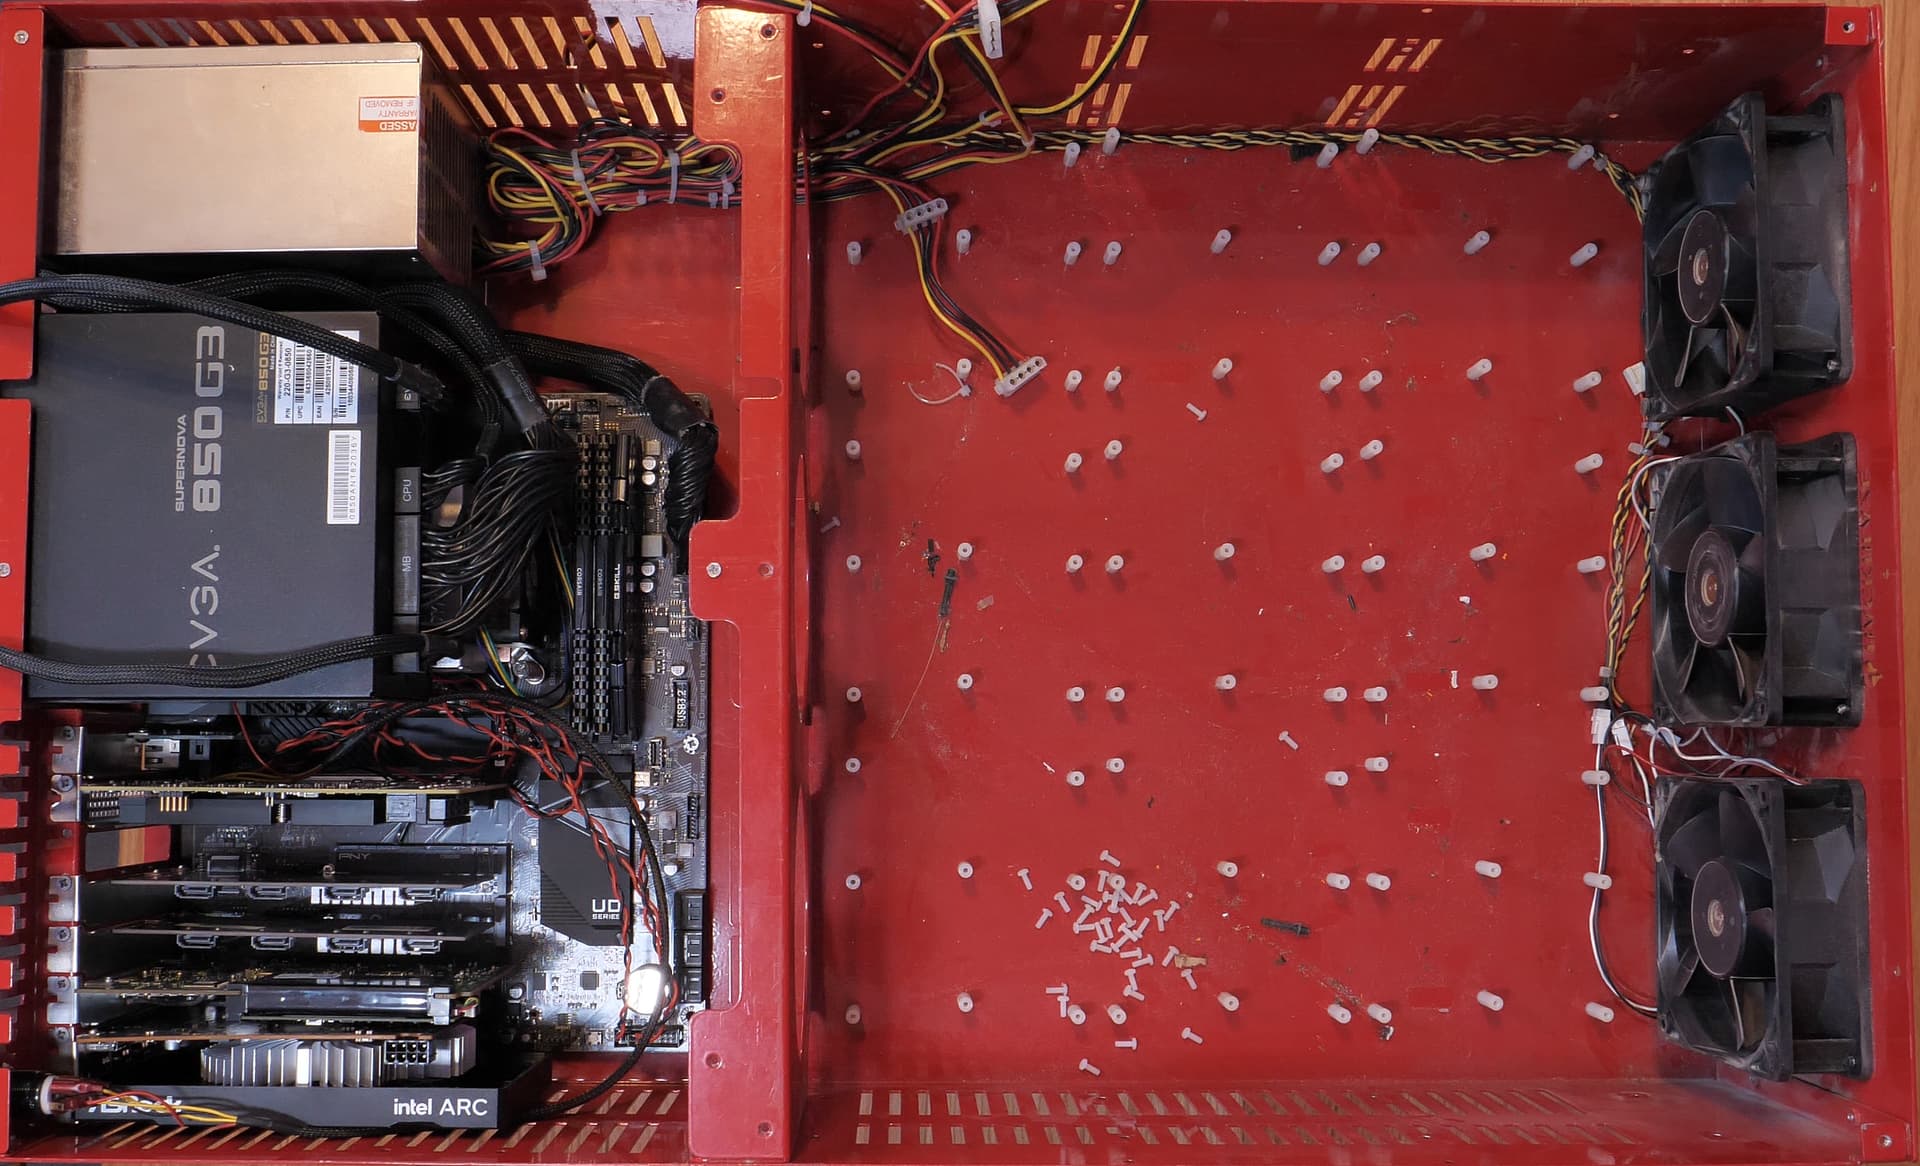
My “bare” storage pod chassis did not have stand offs or spacers. I poked the corp but nobody could get me the answer as to what size stand offs I needed so I grabbed a variety pack off Amazon and found that 15mm+6mm(for reference in case anyone happens to stumble upon a very early chassis with missing parts) was just about right for the PCB backplanes my original unit came with.
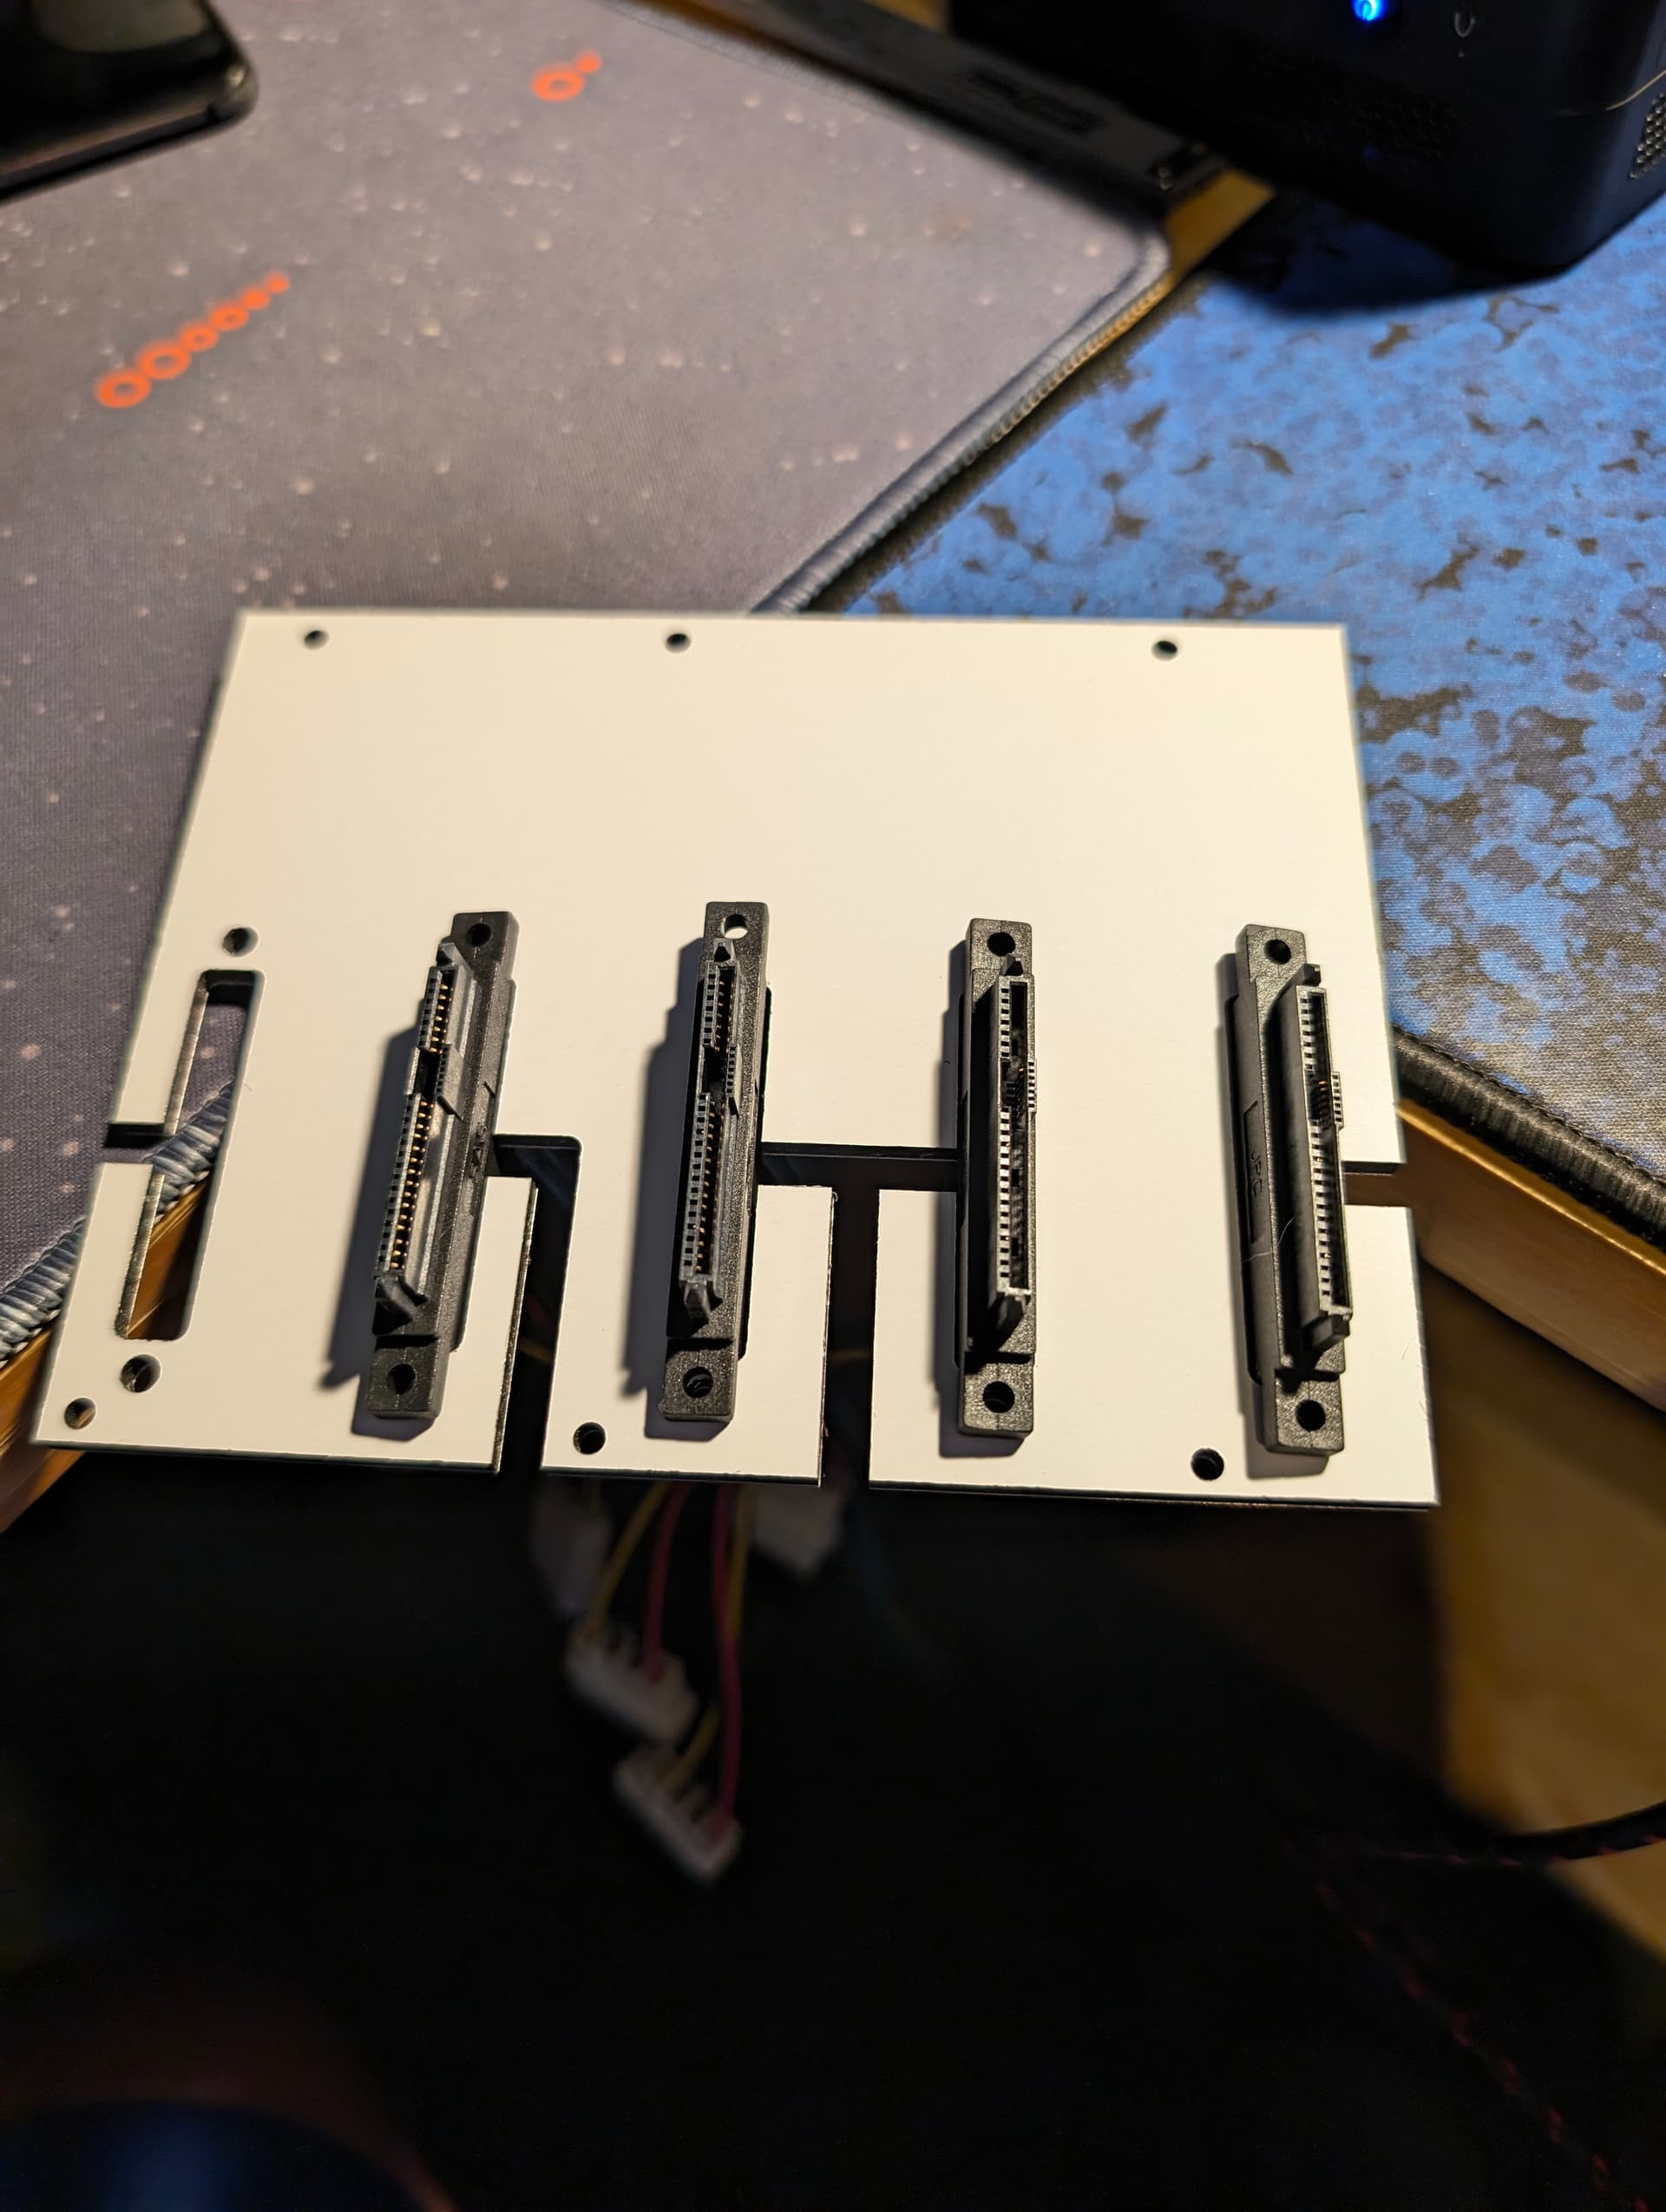
Took the base drawing and thickened it up for printing. It looks solid. All the holes look like they line up as they should. My order of cables just got released to shipping. (So yes they are still available as of this post if anyone else wants to order them) I should see them in a short while when I can find some time to pick them up from the post office.
So now this gives me the opportunity to play with the model. I could go thicker on the mounting plate(take space from the stand offs or work within the voids) and add features like zip tie down channels for cable management. Or maybe play with the placement of the connector location and allow the use of a 2x2.5 drive to 3.5 caddy to hold two ssds in one slot. (Home lab style Hybrid Storinator).
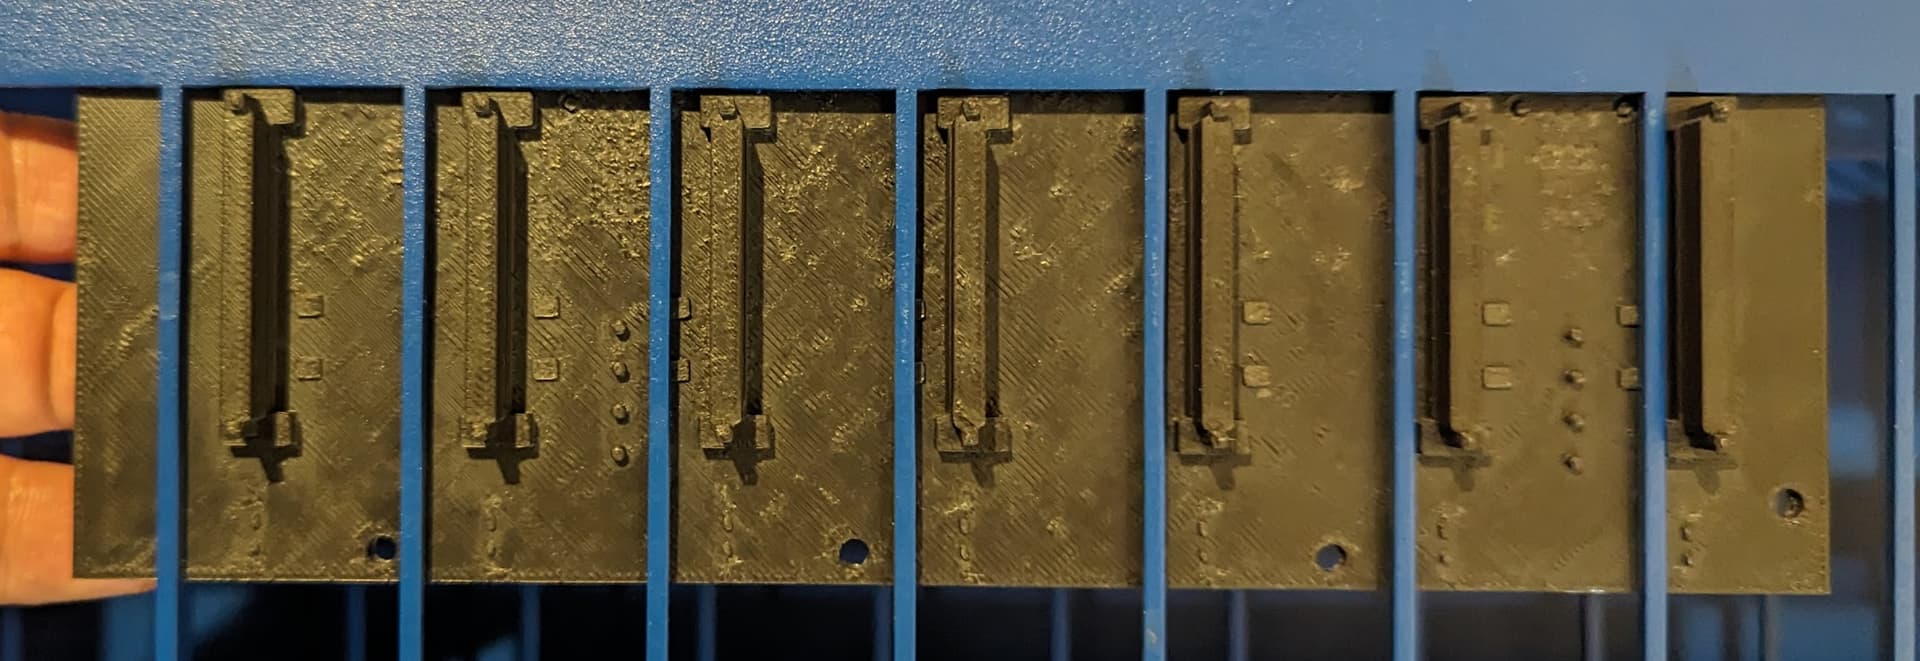
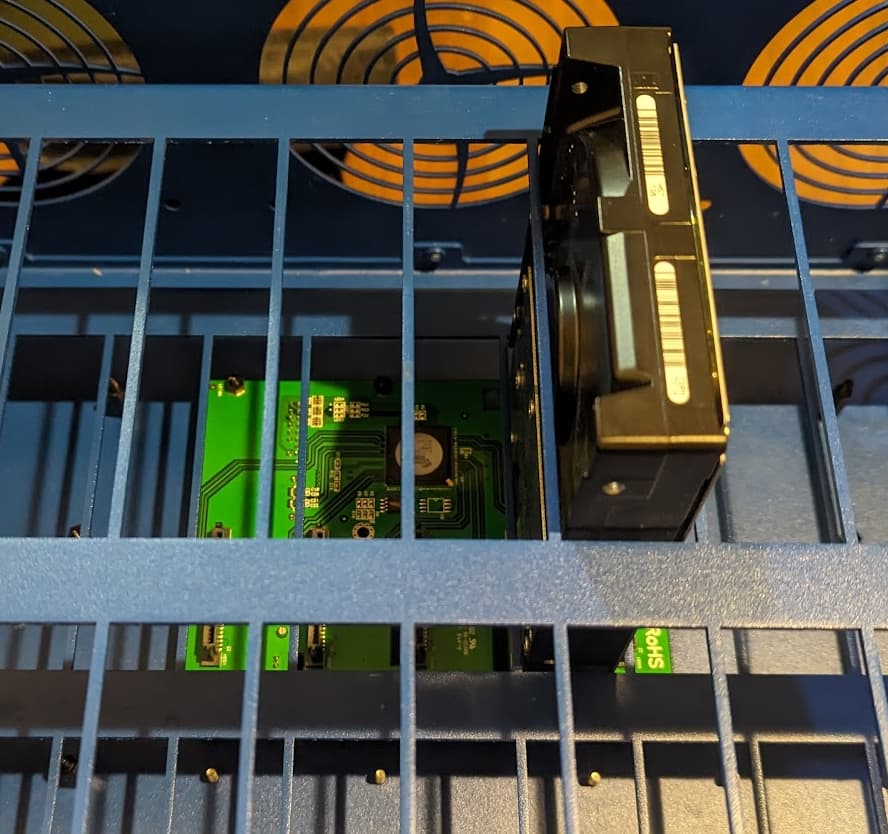
One more thing. I was not happy with the wiggle room the drives have in the drive cage. It felt a little uncomfortable with the vibrations and the weight of the drives resting entirely on that connector.
I ended up designing little channel shims that go into the sides of the drive cage slots that give the cage a bit more grip on the drives as well as secure them. They give the hard drive a nice solid feeling now when they are inserted.
Im not sure if this is a good idea but I did not want to sacrifice PCI slots to the sas expanders. I ordered two AEC-82885T and they can run off of molex power stand alone. Will also need to draw up a plug for the external connector as I won’t be using them.
I will share all files to the community once I feel comfortable with the designs.
@Hutch-45Drives Does 45drives offer the extended faceplate anymore for 2.0/3.0? I would really like to give this chungus a face lift. The cad file for that surely still exists somewhere.
So I found that there is a z issue with the backplane/carrier boards I had made in 3mm ACM when drives are installed using the stock standoffs. So I’ve resent out the design except this time for .8mm stainless steel. That should give enough room and if not I will have to find lower standoffs. As for the cable room I was able to fit all of the molex adapters under the current design, it is a tight fit though. I may end up soldering the highpoint molex cables together into a single molex connector using properly sized wire for the expected load.
As for the sas expanders I had planned on running them using the molex plug and was thinking about eventually mounting them somewhere above the motherboard by the power supply.
And as for the comment I made previously about using rivets, I assembled a single test board to verify mounting and I used aluminum rivets as that is what I had on hand. Can very much not recommend that as disassembly, if ever needed, would be very difficult without damaging the cables. Not that it matters anymore but the rivet would like to pull through the ACM. I’ll be testing again with the new stainless boards and some nylon blind rivets from McMaster.
HI @blitz, I will check with the team to see if we still have it and what we can do. I’m sure we could do a 1 off order for you to get a faceplate for you. did you want a special design or just a standard solid colour?
if you want a custom design there will be an additional fee I believe
My cables will hit the post office this Friday. Looking forward to testing fitments on my end. I’m testing a new variant reclaiming the blank space from the span. Not quite sure if I’m happy with the rigidity of it now. Thinking of maybe enclosing gaps for the cable insertion. (maybe they can be inserted at a angle)
@yingste trying to just manage only the molex power leads is already making me regret my life choices lol. Thoughts on this adapter/spliiter? Thinking of making custom cables that terminate to these.