It’s been a while since I installed my own CPU / Heatsink. Went to Microcenter to please Red Shirt Jeff haha and picked up the saaaaweet Threadripper Pro Zen 3 (WRX80) for my HL15. Told em to give me some awesome liquid cooling with RGB (because why not) and they handed me Mag Coreliquid P360.
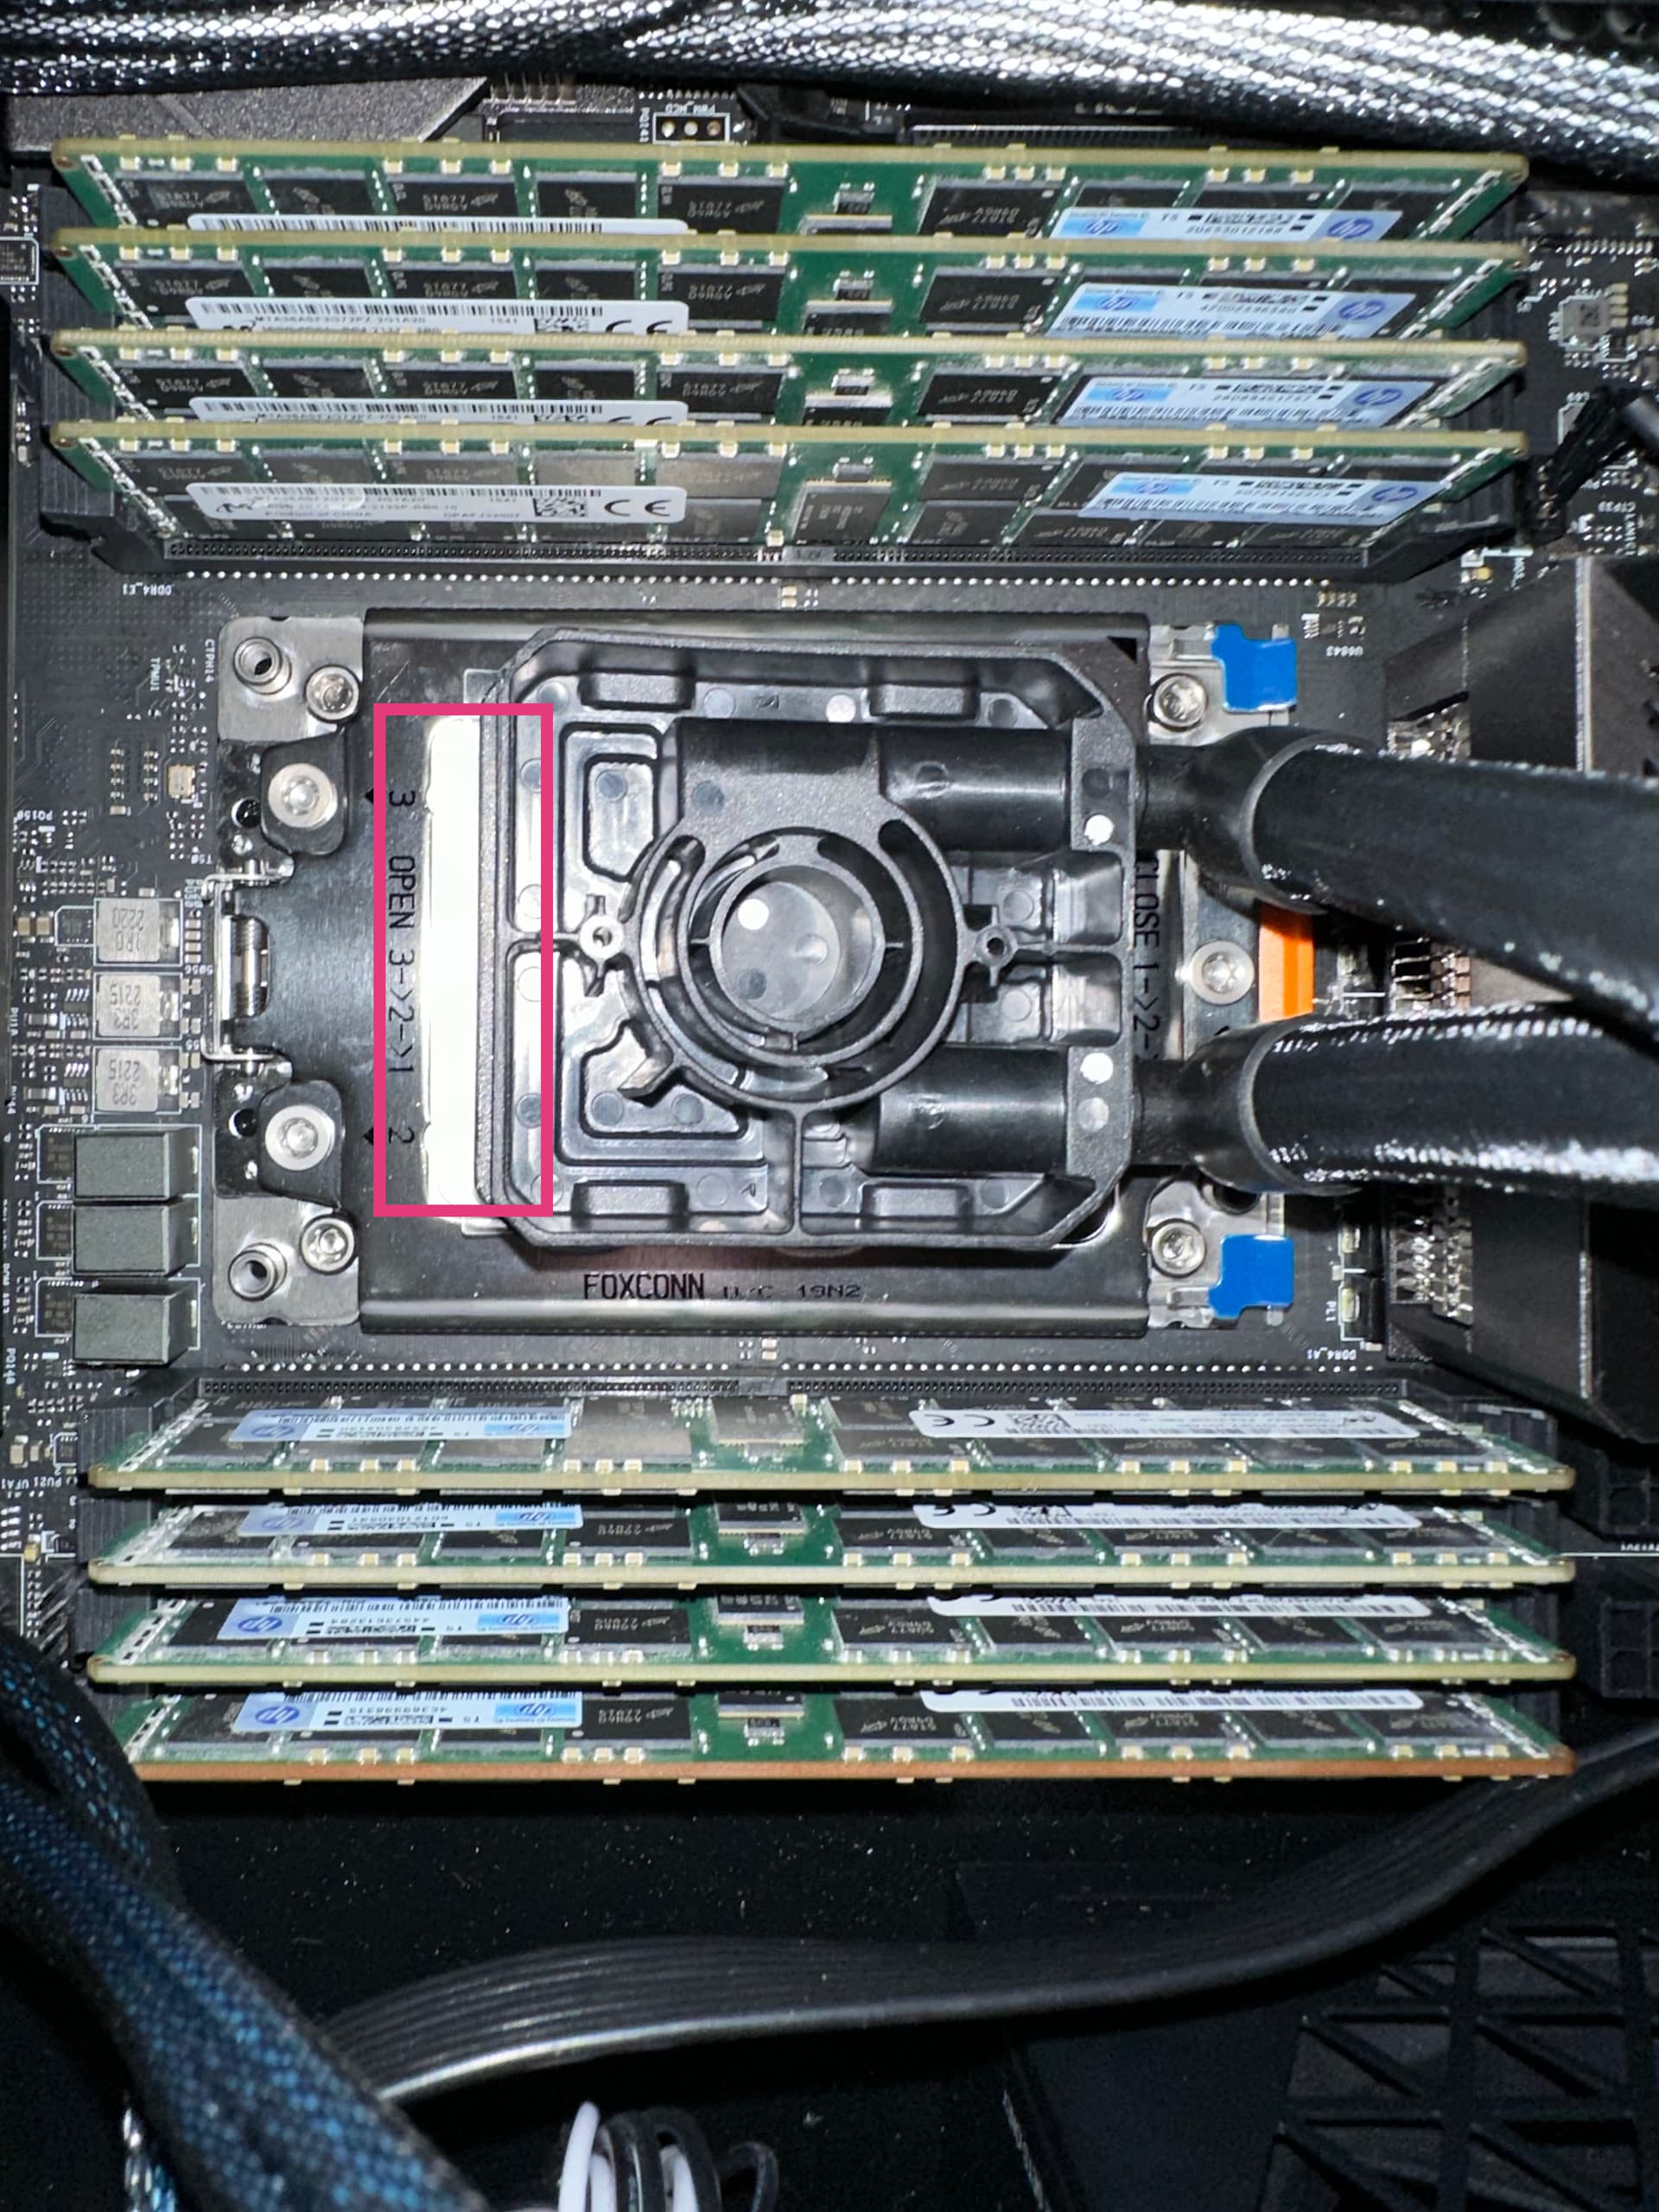
Question - is the heatsink supposed to cover the ENTIRE CPU? In my instance, there is a measurable gap:
You’ll be fine. The IHS does not cover all the chiplets from what I understand. I believe the cooler will be doing plenty positioned above the actually chiplets. Steve from Gamer’s Nexus has all your answers and more on this post and video. The ones that he was looking at were even smaller than the one you are using. So again, I think this will be more than fine.
I should have read his whole post! I see he wrote the model now.
Looking at the link you shared, and digging through the installation guide, I don’t see anywhere showing the cooling block/pump can be separated from that plastic base. I could be wrong and am happy to be.
@doodlemania , is there a missing component to the actual CPU block that we’re also not seeing? I know you mentioned the radiator, but it’s the cpu block that looks strange.
If the CPU block has the black shround with the branding (and likely some RGB?), when you put that on along with the bracket it should help center it and disperse that gap you mentioned. At that point, it would probably minuscule and nothing to worry about!
That’s exactly right @orix - I had removed the shroud because I had accidentally put the bracket on backwards first round and thought I was going to have to rip it apart to get it to let go! Shroud back on and indeed, it helped center it a bit. The anchoring bracket really surprised me as it didn’t have to anchor behind the motherboard (the holes were provided on the socket) - just added 4 standoffs and boom!
Lookin good! That makes more sense now given the first picture, which had me a bit nervous someone had given you the wrong product. Get it built and let us know how it’s going! May your first boot POST cleanly!
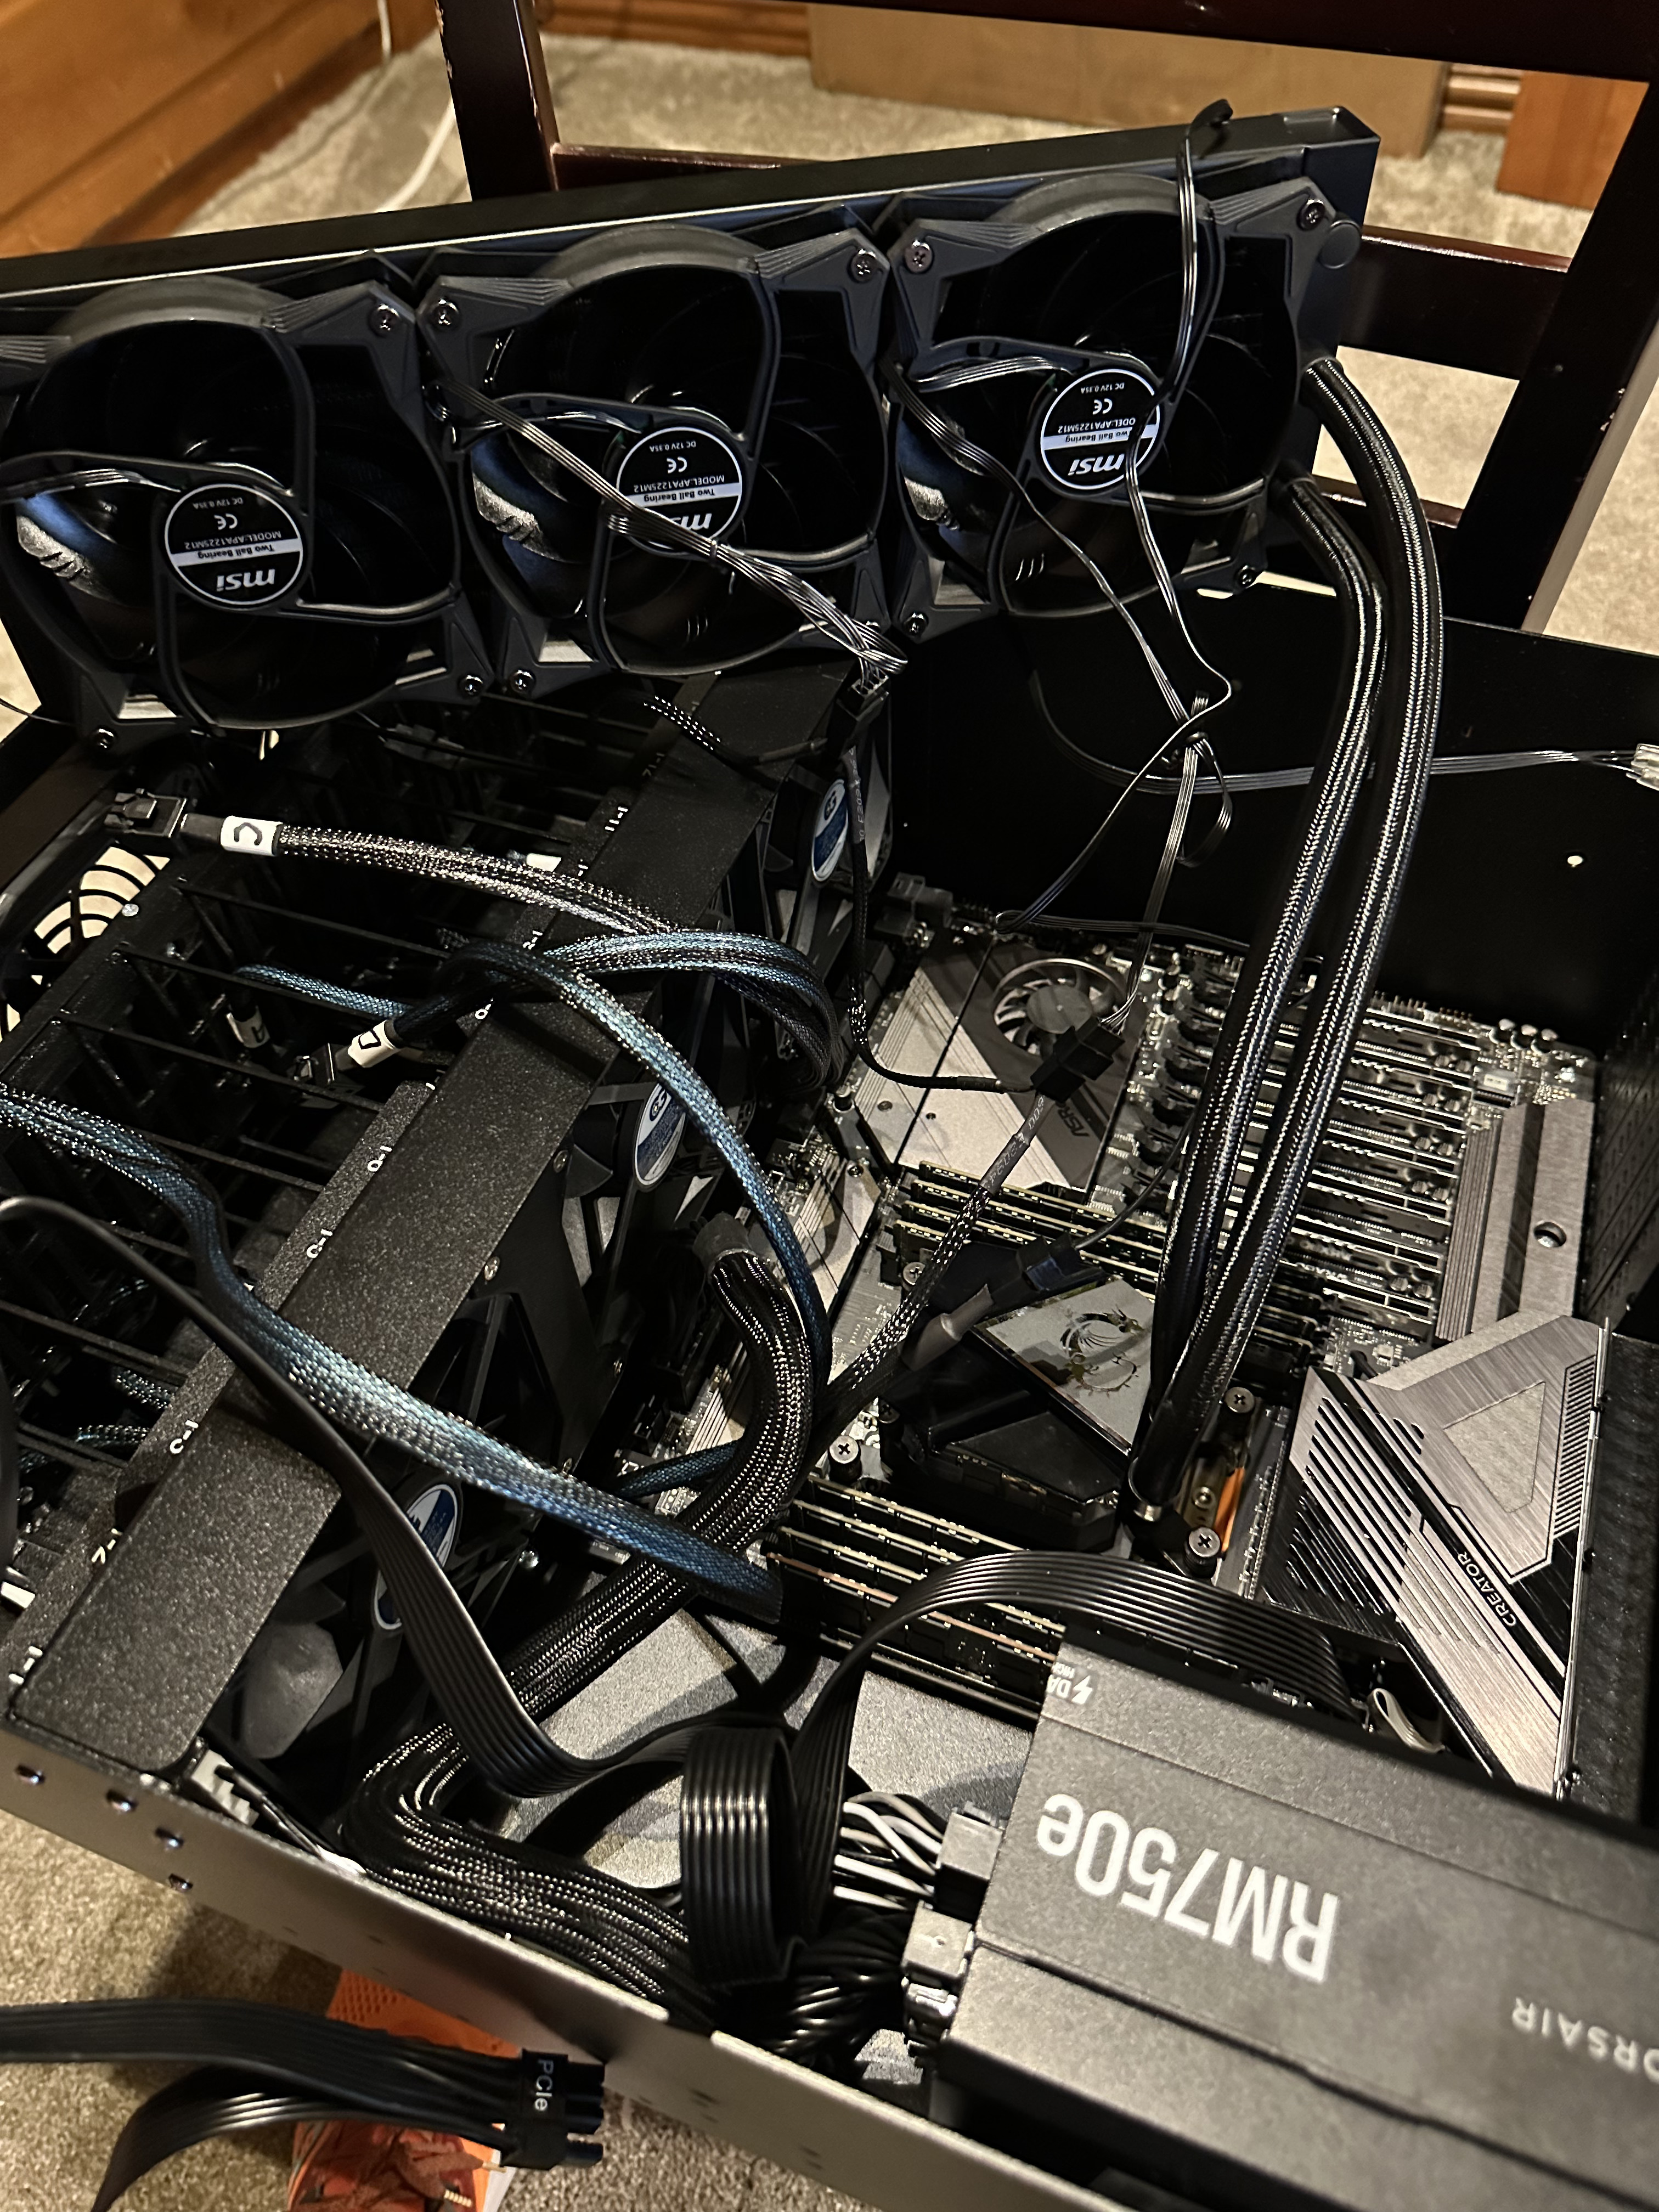
Are you taking out the 3x120mm from the mid-mounted fan bracket and installing this instead? Everything’s extremely tight in this HL15.
Nevertheless, fantastic and useful shot showing how much it has been ‘depth optimized’.
It looks like there’s some distance between the 3x120mm so your mount story for a 360mm radiator might be a little complicated with the screw holes not lining up? Do you have a solve for that in mind?
I think it will fit snuggly right up against the provided fans like this:
Front of case | Fans | Drives | Fans | CPU Radiator (fits perfectly) | Radiator Fans | everything else
In this instance, as long as the air isn’t already too hot coming onto the CPU radiator from the drives, it will stay in place snug without mounting it. Not yet convinced, but the alternative will be to run the radiator out the PCI slots (meh).
Of course! But you gotta be on the #fediverse#mastodon or otherwise cause that’s where all the cool kids are these days
One teensie update, the power cable for the MB got in the way of anchoring the radiator, so, I’m going to bring it outside the enclosure with a little bit of grider work on the lid. More soon!
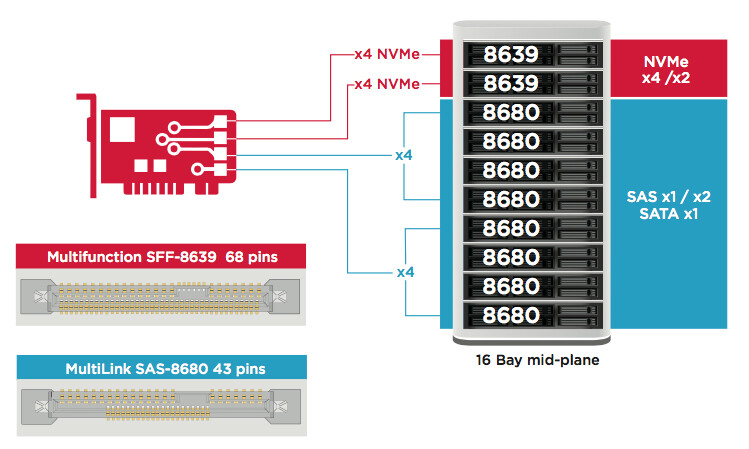
I learned something new today about SAS controllers. Don’t make fun of me I didn’t realize that NVME SAS drives require a different type of controller than spinning disk SAS drives. That’s several hours of troubleshooting in my life I’m not getting back! Now to find a good NVME controller add on card.
I found that out the other day when someone (I think you actually) suggested U.2 drives instead of SATA SSDs. Sorry I didn’t comment on that since it now affected you.
Another thing I discovered, I think, is that some tri-mode HBAs (maybe all?) only support NVMEs in certain ports.
I can confirm at least the part of some HBA’s only supporting U.2 NVME in some slots. Several of our Dell R750’s function this way. it’s a bit disorienting and frustrating at times to figure out where the disk is in ESXi as it shows the HBA enclosure as the parent device, but digging deeper it’s actually a PCIE bus to the CPU using the U.2’s controller.